Showing posts with label #dazzleqal. Show all posts

Dazzle Quilt Along Week 11

>> Tuesday, May 4, 2021

   It's here - the week we put together the quilt top! It's Week 11 of the Dazzle Quilt Along.

Dazzle quilt Sarah Vanderburgh Sew Joy Creations

These posts will always be available so start when you're ready!
You can find a link to all of the posts in one spot - right here.

Newsletter subscribers have access to a free weekly tracker for this Quilt Along :)


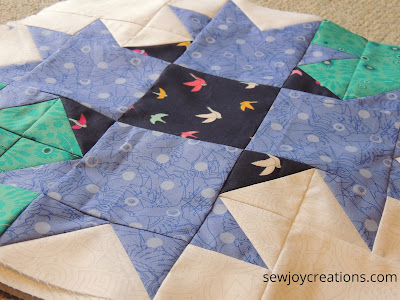
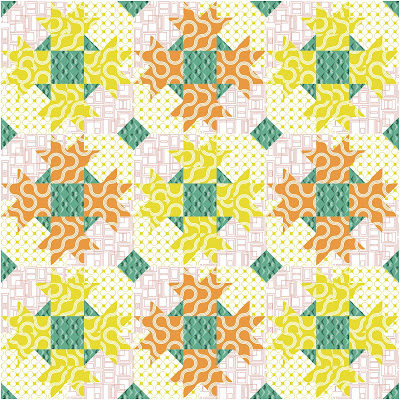
This is my favourite week! It's time to sew the blocks together to make the quilt top. The Dazzle quilt reveals it's secondary pattern this week. Take a look!


Dazzle Quilt Sew Joy Creations


The lap size is quite large and I needed more room than my design wall to lay out blocks. Lucky for me I can use the my queen size bed for this task. I would sew a row then return it to the bed to keep the rows in order and out of the way.


Dazzle quilt blocks bed design wall


Follow the instructions in the pattern to assemble the rows. The one piece of advice I have at this stage is that all of the corner triangles were ironed the same direction when making the blocks; at this point I finger pressed some to make the seams nest. It's not necessary to do this - and the performance icon I'm using by PFAFF does a great job of sewing evenly over these seams - but if you find your blocks are not coming out the way you would like, try finger pressing one seam in the opposite direction. 


Dazzle Quilt Sew Joy Creations


Once the quilt top is assembled there are two things to do: iron all the new seams and sew 1/8 " all the way around the outside edge of the quilt. These stitches keep your outside seams from unravelling and give the seams extra stability. If you plan to have your quilt finished by a long arm quilter they may also request you add this row of stitches - my local one does.


My Dazzle for this week - besides the quilt top? I played 'bobbin chicken' sewing that final row of stitches to the quilt edge and won! 


Enjoy putting together the Dazzle quilt top this week. 

With Joy,

Sarah V.

Read more...

Dazzle Quilt Along Week 10

>> Tuesday, April 27, 2021

   Week 10 is here for the Dazzle Quilt Along.

Dazzle quilt Sarah Vanderburgh Sew Joy Creations

These posts will always be available so start when you're ready!
You can find a link to all of the posts in one spot - right here.

Newsletter subscribers have access to a free weekly tracker for this Quilt Along :)


Block E


I named the blocks in this quilt D and E because each is the name of the main fabric in each block. I think my brain works a bit differently when naming the pieces and fabrics for a quilt and I hope it doesn't confuse you too much! I have always been a 'block-of-the-month' quilter and labelling fabrics for a whole quilt is still a learning process for me as a pattern designer.

Here is Block E with it's beautiful fuschia from Allison Glass.


I love the POP of brightness this fabric adds to the block. I can see myself making another Dazzle quilt with Allison's new fabrics too - they are even brighter!


This photo shows you the non-directional nature of the middle fabric and how it works so well to add another element to the design. Notice the small scale of the birds as well and how they create a bit of movement and interest. I didn't have too worry about how to set the center fabric as I made the blocks which is nice too - just sew the units together and the block is done.


Remember to follow the pressing directions in the pattern so the blocks will nest together next week with the Block Ds.


The dazzle in my sewing space this week is this wonderful pair of embroidery scissors. They are nice and sharp and pointy and I love using them. I use them for cutting my threads and don't feel bad at all about not using them for embroidery - they work great for the job I use them for and that's what's imporant to me right now. I also like how the handles are both the same size so they can be used easily if you are right or lefthanded; something I noticed when my daughter was sewing with me last year (she's a lefty).


We are sooo close to done the quilt top! The finished blocks may not fit in the storage container you've been using to store the Dazzle quilt parts; try to keep them flat and ready to be sewn together next week.


Stay safe and keep quilting!

With Joy,

Sarah V.

Read more...

Dazzle Quilt Along Week 9

>> Tuesday, April 20, 2021

   Week 9 is here for the Dazzle Quilt Along. This week we start making blocks!


Dazzle quilt Sarah Vanderburgh Sew Joy Creations

These posts will always be available so start when you're ready!
You can find a link to all of the posts in one spot - right here.

Newsletter subscribers have access to a free weekly tracker for this Quilt Along :)


Putting the pieces together


angle view Block D Dazzle Quilt


This is the week to put together the Block Es of the Dazzle Quilt. All that precise piecing and trimming will start paying off as you sew them into blocks.


block D Dazzle Quilt Sew Joy Creations


Follow the pressing directions in the pattern to have seams that meet and overall flat blocks. The blocks will nest nicely with next week's blocks too! 

You can see in the block how the two background fabrics contrast with the center design.

The center shoofly starts to appear in the blocks too.


shoofly Dazzle Quilt Sew Joy Creations


What's dazzling in my sewing space this week? My purple pincushion! This pincushion was made using the built in stitches on the PFAFF performance icon. I used pins this week to assemble the quilt blocks because of their size. 


pincushion joy PFAFF performance icon project


Whether you're keeping up or just beginning, I'm glad you're here quilting with me!


Leave a comment and let me know what's dazzling in your sewing space this week.


With Joy,

Sarah V.

Read more...

Dazzle Quilt Along Week 8

>> Tuesday, April 13, 2021

   Week 8 is here for the Dazzle Quilt Along.

Dazzle quilt Sarah Vanderburgh Sew Joy Creations

These posts will always be available so start when you're ready!
You can find a link to all of the posts in one spot - right here.

Newsletter subscribers have access to a free weekly tracker for this Quilt Along :)


Geese and Squares


These are the last units to assemble before we put the blocks together! This time we are going to do ALL the Geese and Square units of both colors to get them DONE. Are you with me? :)

geese and square units Dazzle Quilt Sew Joy Creations

+

These units should go together quite easily, but you might run into some uneven edges on your flying geese units. Don't worry! Here are some tips to help:

fudging a seam allowance Dazzle Quilt Sew Joy Creations


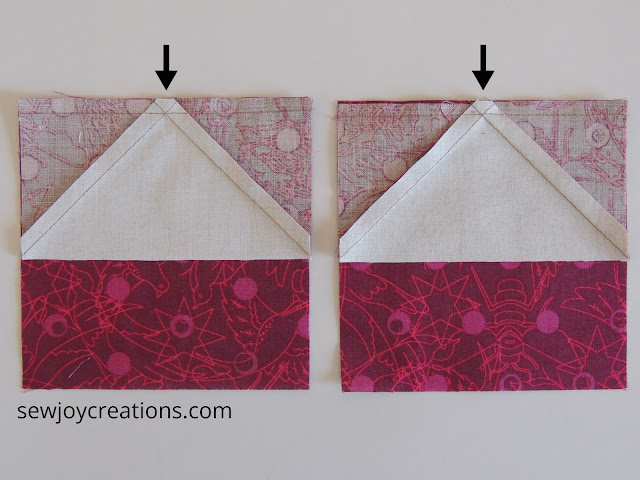
The flying geese unit on the left has an even edge and 1/4" seam allowance the full length of the edge. You can see that when it was sewn to the square below that the edges of both pieces aligned and that the seam allowance was accurate because the seam went right over where the two seams on the goose block intersected. This is what you want - to have the seam go through that spot.

Notice the unit on the right does not have an even edge. In this case I lined up the seam allowance as best I could which left some of the square showing at the edge. If the amount showing is less than 1/4" it's not a problem - the seam will still join the units and the 1/4" seam allowance will be maintained. Not ideal, but it will work. I had several units where a small part of the square fabric was showing through at the edge and I used the geese blocks anyway. The only time I wouldn't is if the 1/4" seam allowance couldn't be sewn - then I would need another goose block.

geese and square units second color Dazzle quilt Sew Joy Creations

Some would call this tip, how to 'fudge', but really, it's just something you learn to deal with the longer you quilt. If when you press the seam you can still see the flying geese point, then all is well with your quilt. Even if it's a little tucked under the seam the unit should still be usable. With practice, you'll get better at fudging too ;)

sewing room container

This week's dazzle is this fun little Singer sewing machine container that my mother in law found and gave to me. You can see some of the sparkle on the container in the photo. It doesn't have a use yet, but it does make me happy!

Here's to another week of quilting. Stay safe and support your local quilt shop!

With Joy,

Sarah V.


Read more...

Dazzle Quilt Along Week 7

>> Tuesday, April 6, 2021

   Week 7 is here for the Dazzle Quilt Along.

Dazzle quilt Sarah Vanderburgh Sew Joy Creations

These posts will always be available so start when you're ready!
You can find a link to all of the posts in one spot - right here.

Newsletter subscribers have access to a free weekly tracker for this Quilt Along :)


More Corner Units


corner units Dazzle Quilt Sew Joy Creations


There's only a month left to go in this quilt along! Of course you could work ahead, but this weekly pace was planned to help you make a little progress while working on other projects. 

I also thought it might be hard for you - like it is for me - to get into quilting right now; having just a little bit to do can be the nudge you need to sit down in front of your machine for a few minutes. 

So, here we are:)

This week's units go together in the same fashion as last weeks so it might be more enjoyable to sew all the bits together. Again these units make me excited as I know they are key to the overall design in the quilt pattern.

Remember to follow the pressing directions as written in the pattern!

pink handmade star ornament

I've started taking photos of things I keep in my sewing space that add a special touch - make the room (or me) dazzle a bit because of it's presence. This handmade ornament was a Christmas gift from a quilty friend one year. I think it looks dazzling with the fabrics in this quilt.


I hope this week has you feeling a bit optimistic about the final steps for this quilt. These last two weeks were the most intensive as far as sewing together small units. 


Keep quilting! With Joy,

Sarah V.


Read more...

Dazzle Quilt Along Week 6

>> Tuesday, March 30, 2021

   Week 6 is here for the Dazzle Quilt Along.

Dazzle quilt Sarah Vanderburgh Sew Joy Creations

These posts will always be available so start when you're ready!
You can find a link to all of the posts in one spot - right here.

Newsletter subscribers have access to a free weekly tracker for this Quilt Along :)


Corner Units


Dazzle quilt Sew Joy Creations corner units

This week we start to put together the units into larger units for the final block assembly.


chain piecing Dazzle Quilt Sew Joy Creations

With a big mug filled with the hot beverage of your choice, chain piecing is the best way to get these units made. Over several sittings you can easily finish these units in a week. With a few hours of time, one sitting could complete all the sewing too.

Follow the pattern for diagrams and pressing directions to make final assembly go smoothly.

I have been working a bit ahead and consider this week's and next week's corner units the key to making this quilt dazzle! 

Keep going. Enjoy the week and I'll be back next week with more encouragement :)


With Joy,

Sarah V.


Read more...

Dazzle Quilt Along Week 5

>> Tuesday, March 23, 2021

 The first month is over and now it's Week 5 of the Dazzle Quilt Along.


These posts will always be available so start when you're ready!
You can find a link to all of the posts in one spot - right here.

Newsletter subscribers have access to a free weekly tracker for this Quilt Along :)


Dazzle Quilt Sew Joy Creations


Corner Squares

This week another technique is used to add a triangle of one fabric to one corner of a square. It is sometimes referred to as stitch and flip. The trick to having a unit that finishes square is to sew the line close to but not directly on the drawn line. I think of it like writing your name on a lined piece of paper - try to make your line rest just slightly above the drawn line. This helps your unit finish square as there is tiny bit of the fabric from the added triangle taken up in the seam when it is ironed.

corner squares Dazzle Quilt along Sew Joy Creations
Until you get the hang of where to sew the line, simply fold back the triangle before ironing to see if it will lay square with the remaining background fabric. With practice you will find the right place to stitch and it will become second nature.

Especially when you stitch all the Fabric A and Fabric B corner squares!

corner squares Dazzle Quilt Along

My something Dazzling this week in my sewing space is this turquoise Aurifil thread that matches so well with my Allison Glass print I'm using as Fabric B. 

Week 5 To Dos

~ Make all of the Corner Square units with both Fabric A and Fabric B.
~ Following the pressing directions in the pattern to help your units lay flat.
~ Keep your unit parts flat and organized for another week


I hope you are enjoying these weekly posts! You can work ahead but also, take your time. I imagine you are working at several projects at once; and if you don't have much time in a week to sew, doing a few corner squares each night will get your units finished too.

With Joy,

Sarah V.

Read more...

Dazzle Quilt Along Week 4

>> Tuesday, March 16, 2021

  Week 4 is here for the Dazzle Quilt Along.

Dazzle quilt Sarah Vanderburgh Sew Joy Creations

These posts will always be available so start when you're ready!
You can find a link to all of the posts in one spot - right here.

Newsletter subscribers have access to a free weekly tracker for this Quilt Along :)


Half Square Triangles

half square triangles Dazzle Quilt Sew Joy Creations


More half square triangles this week! Like I've said before, this is a great pattern for working on your basic construction skills for different quilt block units.

How did you do last week? What would you do differently?

This time around I found myself eager to get done and batched more of my steps together. Try doing all of one step then doing the next one; for instance, I drew the lines on all of the squares for both different units at once. This helped me keep the momentum going and made quick work of this second round of half square triangles.

There are lots of quilts where half square triangles are the main unit so finding a technique to make accurate ones is important.

Churn Baby Churn quilt pattern Sew Joy Creations


My Churn, Baby, Churn quilt pattern is just one example where half square triangle units dominate the quilt top. 


Keep your units organized with the rest of the parts we've been putting together.


Enjoy sewing some straight lines this week!


Sarah V.


Read more...

Dazzle Quilt Along Week 3

>> Tuesday, March 9, 2021

 Week 3 is here for the Dazzle Quilt Along.

Dazzle quilt Sarah Vanderburgh Sew Joy Creations

These posts will always be available so start when you're ready!
You can find a link to all of the posts in one spot - right here.

Newsletter subscribers have access to a free weekly tracker for this Quilt Along :)


Half Square Triangles


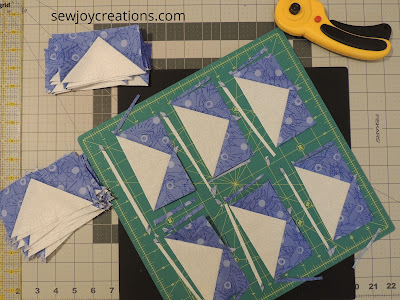
The next few weeks we'll be making the unit parts for the quilt blocks. Precise cutting of fabric pieces is the first step in getting blocks that finish at the right size - piecing is next! 

I still draw lines on the back of my fabric squares but there are tools and techniques that make this step quicker and still accurate. I also am now a converted trimmer and use squares a bit larger than needed then trim the half square triangles to the size needed.

half square triangles Dazzle Quilt along


Why do I trim now? Believe it or not, it's faster and more accurate for me at this point. I do most of my quilting time after work so my eyes and body are not as keen as they are after the first cup of coffee ;) Trimming means I don't have to be as accurate with my cutting and stitching and still have enough fabric for my units to come out the desired size.

I've also recently started to use the Bloc-Lo rulers at the insistence of the staff at my local quilt shop. They were right! I can now trim units after work and they come out the right size - with no concern for the safety of my fingers either. 

I've never been a gadget quilter but there's something to be said for trying out tools that make things easier while still accurate. Maybe you use a tool I should know about? Leave me a comment and tell me about it.


Week 3 To Dos


week 3 hsts Dazzle quilt along

~ Make the half square triangles

You could do this over several days like I did. I did one of the steps in the pattern each day until I had all three different hsts made using Fabric C.

Tip: be sure to follow the pressing directions given in the pattern - final block assembly will be much easier with the resulting nesting seams.

Take your time and be accurate with your sewing and trimming - the half square triangles are just one unit needed to make the blocks. Each unit literally builds onto the next!


Enjoy!

Sarah V.


Read more...

Dazzle Quilt Along Week 2

>> Tuesday, March 2, 2021

 This is Week 2 for the Quilt along featuring the Dazzle Quilt pattern.


Dazzle quilt Sarah Vanderburgh Sew Joy Creations


These posts will always be available so start when you're ready!
You can find a link to all of the posts in one spot - right here.

It's all about the Geese

no waste flying geese method dazzle quilt along

The Dazzle quilt pattern uses a no-waste flying geese method which makes 4 geese at a time.

I have used this method a lot and like it because of the no waste and for quilts where I need to make a lot of these blocks. It's not the only method out there so you do have the option of making geese in your preferred method - just check the pattern for size and number of geese blocks required. (note that the fabric requirements in the pattern are for this method though - you might need more if you use a different technique)

One of my favorite things about this pattern is that the blocks are made up of traditional basic units; practicing these units and seeing them turn into a quilt is something that never gets old for me.


Week 2 To Dos


chain piecing no waste flying geese

~ make the required number of geese blocks. I found that chain piecing made this step go even faster.


trimming geese blocks rotating cutting mat

~ trim accurately! Trim from the 'goose' side first to keep the point inside the seam allowance. I trim using my rotating cutting mat to do several at a time. 

Here's a link to a post I did as part of my Quick Tablerunner tutorial - it has lots of photos of this flying geese technique including a closeup of the trimming.


~ keep your geese organized. Once you have finished all the required geese blocks according to the sie of Dazzle quilt you're making, keep them laying flat and ready to sew into the blocks with the rest of your project fabrics. I don't like to have to re-iron after storing block units and I'm sure you don't either :)

~ check week 2 off your list! Whether you do a little bit of this step each night, or dedicate a chunk of time to this week's task, know that you have done a great job this week. 


Thanks for quilting along!

Sarah V.


Join my newsletter list to stay up to date with sew alongs, pattern releases and more. Plus you get to enjoy freebies that are only available to my newsletter subscribers. Click the image below to sign up!

Newsletter subscribers have access to a free weekly tracker for this Quilt Along :)


Read more...

Dazzle Quilt Along Week 1

>> Tuesday, February 23, 2021

 I'm sew glad you're here!

This is Week 1 for the Quilt along featuring the Dazzle Quilt pattern.

Dazzle quilt Sarah Vanderburgh Sew Joy Creations


These posts will always be available so start when you're ready!
You can find a link to all of the posts in one spot - right here.

Let's get started!

Read the Pattern


This week is all about cutting your fabrics. I like to read through the quilt pattern and look at all the photos/diagrams before cutting. Why? Well, sometimes a photo tells you things you need to see to understand. 
I look and think about 
what is creating the design elements that I like
and 
how I can make that happen with my fabrics?

Sometimes it's the fabric that makes the quilt!

When looking at the Dazzle quilt it's hard to see where one block ends and another begins. Part of the look of the quilt is a result of the fabrics chosen; there are essentially two background fabrics and there needs to be high contrast between them. In addition, the more contrast the better between all of the fabrics to keep the 'dazzle' strong! 

I chose bold colors for this quilt and added one white background. The bird print below will be in the center of each block. I don't recommed prints with obvious, small scale repeats because with the cutting and piecing it will be hard to maintain directionality.

I chose this bird print below because it is multi directional - the birds are different sizes and fly in different directions with no obvious repeat to my eye. The dark background of this print will contrast nicely with the rest of my bold fabrics - and a bit of the pink and a shade of the blue are also in it - I had to use it!

bird print multi directional print dazzle quilt


That's not to say a low volume contrast won't also create a quilt that dazzles.

Here's a mockup I did using Good Vibes fabric and the baby size Dazzle quilt. Here I used two light volume fabrics for the background fabrics. The rest are still bolder, but the feel is less vibrant and the overall look more restful to the eye. Notice here how important the center fabric is to moving the eye around the quilt - here the shooflys are more dominant in the design.


dazzle quilt baby quilt good vibes fabric


Week 1 To Dos

~Cut fabrics for the quilt top

You might want to wash and/or iron them first. I used to be a wash-everything-as-it-comes-into-my-sewing-room kind of quilter, but that was years ago! Now I iron before cutting and feel no anxiety about colorfastness or shrinkage. I use the best cotton fabrics I can afford.

Use the cutting instructions in the pattern to cut the pieces for the entire quilt top. This will make the rest of the sew along all about sewing! I even cut the binding strips and have them ready to sew together.

Dazzle quilt fabric rotary cutter long ruler


The Dazzle quilt pattern has a fabric selection sheet;
 clip a small piece of each fabric and glue it to this page. 
I refer back to this page often as I sew - it's worth the time and fabric!

~Keep the cut fabrics organized

For this quilt it's pretty easy to keep the pieces organized. You can put your cut pieces in a container until next week if you're like me and making other things too!

quilt fabric cut Dazzle quilt scrapbook organizer bin fabric storage


~Share!

Join me in my facebook group where you can share photos of your fabrics.  Or simply leave a comment on this post telling me you're sewing along :)


Enjoy cutting this week!

Sarah V.


Join my newsletter list to stay up to date with sew alongs, pattern releases and more. Plus you get to enjoy freebies that are only available to my newsletter subscribers. Click the image below to sign up!

Newsletter subscribers have access to a free weekly tracker for this Quilt Along :)


Read more...

Dazzle Quilt Along

>> Monday, February 15, 2021

 The first Sew Joy Quilt Along for 2021 is the Dazzle Quilt!


Dazzle Quilt Sarah Vanderburgh Sew Joy Creations


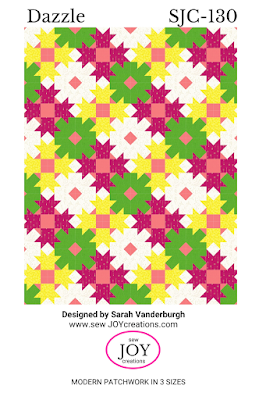
You can read more about the pattern if you'd like in this post - Dazzle Quilt.

Purchase the pattern in my online shop - Dazzle quilt  

This quilt along is planned for weekly sewing and will last 3 months.

Here's how I've chunked the constructing of the quilt:


Week 2 - Flying Geese


Week 9 - Block Ds

Week 10 - Block Es


Week 12 - Finish Quilt - to be continued!

Week 13 - Dazzle!

Newsletter subscribers have access to a free printable weekly tracker for this quilt along. 


Join my facebook group where you can share photos and chat with other quilters. I might even do some live posts there this time! 


I created a free Sew Along Checklist for Quilters - use it to get ready for this, or any other, sew along!


With Joy,

Sarah V.


Read more...

Happy Followers

About This Blog

This blog exists to share my quiltmaking and joy of colour to inspire others to find their joy.

  © Blogger template Simple n' Sweet by Ourblogtemplates.com 2009

Back to TOP