Vintage Holiday Quilted Runner - QUILTsocial week

>> Saturday, August 29, 2020

 This week I shared a special project over at QUILTsocial. The pandemic has me looking at my fabric stash with new appreciation and resolve - it feels like time to use up some of these pretties! 
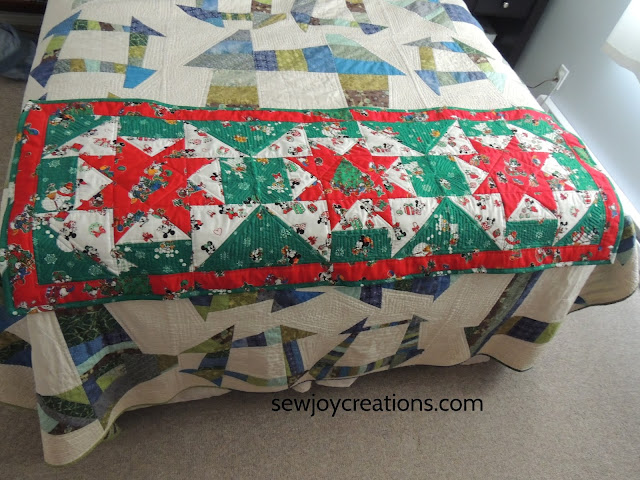

vintage holiday runner queen bed runner

I decided it was time to finally use some vintage fabrics inherited from my husband's granny to make a holiday bed runner.


vintage disney fabrics holiday runner

The first post goes over the fabric requirements and getting the fabulous PFAFF performance icon ready for sewing:

PFAFF performance icon brings vintage fabrics to life


IDT System PFAFF sewing machine


The second post goes over cutting the fabrics and starts to make units for the star churn blocks:

Cutting and piecing the Vintage Holiday quilted runner


star churn block patchwork block vintage fabrics


The runner is made of 3 large star churn blocks - easy piecing!

Piecing star churn quilt blocks together using the PFAFF performance icon


in the ditch stitches quilting foot


Of course having the PFAFF performance icon to use I had to try quilting the runner with different presser feet. What a difference in the quality of the stitches! 

Why 3 different presser feet are better than 1 for quilting this bed runner


Maybe I was trying out all the presser feet to warm myself up to doing some free-motion quilting again :) Really it is starting to be a fun way to add personality to my projects. This bed runner is no different.

Every bed runner should have a little free-motion quilting
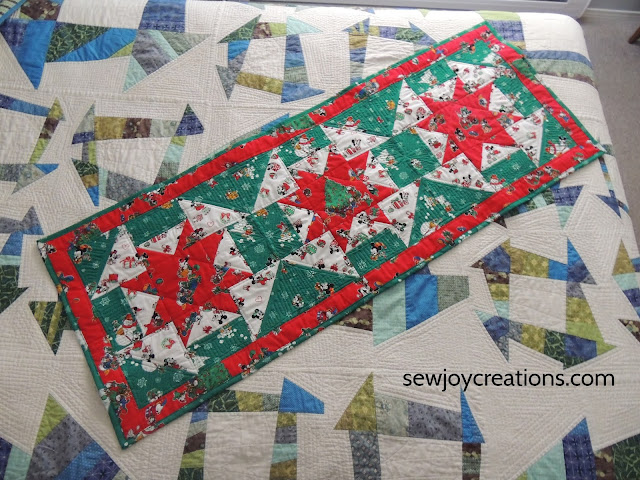


vintage fabric runner holiday runner quiltsocial free project


I know already that I am so happy to have finally made something with these fabrics! The runner can go at the end of my bed or even on the top of my couch for some quick room decorating. And I don't have to worry about the fabrics surviving numerous washes or being used to sleep under.


 Really the runner is a great gift for me and my family. Maybe you need one too!

Please visit the links and leave me comments over on QUILTsocial - it helps my posts get seen over there too.


Thanks and Enjoy!


Sarah V.


Read more...

Dropping In Sew Along Week 4

>> Tuesday, August 25, 2020

Welcome to Week 4 of the Dropping In quilt sew along!


Dropping In quilt pattern Sew Joy Creations

Purchase the Dropping In pattern in my online shop

Paper pattern available through QuiltWoman.com


These posts will always be available so start when you're ready!
 

Today we sew the blocks together into the quilt top!

This might be my favourite week so far - seeing the quilt top come together. This is when the magic happens!

Dropping In quilt blocks

It's easy to use chain piecing again as you sew the blocks into rows; you could sew all of your rows together in one sitting! Of course, that might not be possible with other things to do as the summer winds down, but sewing even one row at a time this quilt comes together quickly. I started by putting some of the blocks up on my design wall just to see the fabrics bring the pattern to life.


design wall Dropping In quilt Good Vibes fabric


Be sure to follow the pattern as it gives guidance on pressing the seams. If you've been following the suggestions so far you'll find only nesting seams to deal with as you put the blocks together. This step is the first one I will use pins for and only to be sure that the blocks don't move while I'm getting the growing rows lined up by my machine.

sewing blocks together PFAFF performance icon


After the rows are ready and pressed, it will be time to sew them together. Take your time and pin here as there are a lot of seams. I like to pin at the nesting seams and then evenly between them just to keep the layers together as I move the top from the ironing board to the sewing machine.
pinning quilt rows Good Vibes fabric Dropping In quilt

Dropping In quilt pinning on ironing board

Basting Tip

When you are done sewing the quilt top together and have the final pressing done, go around the outside edge with a basting stitch. I rarely do this but my local quilt shop owner and long armer insists this is best practice and in this top I can see why! There are several seams that go to the edge of the quilt (common in quilts with no borders.) These seams will start to pull apart just from moving the top around which will mean I won't have closed seam allowances around the edge of the top where the binding will go. Having a quilt unravel is not what I look forward to when I'm done a project!

I set my regular stitch to 3" on the sewing machine and topstitched 1/8" around the edge of the quilt top - this basting stitch will be covered by the binding so no worries about it showing up in the finished quilt. And it will make layering and quilting the top easier whether you are doing it on your domestic machine or longarm or sending it out. Worth the time and thread!

Dropping In quilt Good Vibes fabric PFAFF performance icon

Week 4 to dos

~ Sew the blocks into rows and follow the pressing instructions in the pattern.

~ Sew the rows into the quilt top and press.

~ Do a basting stitch around the edge of the quilt to secure the seams.

~Share!


Good Vibes fabric Dropping In quilt

Join me in my facebook group where you can share photos! I'm also on instagram and using the hashtag #droppinginquilt to show my progress.

Let's #sewjoywithgoodvibes!

Sarah V.

Join my newsletter list to stay up to date with sew alongs, pattern releases and more. Plus you get to enjoy freebies that are only available to my newsletter subscribers. Click the image below to sign up!

Read more...

Reorganizing my sewing room bookcase

>> Monday, August 24, 2020

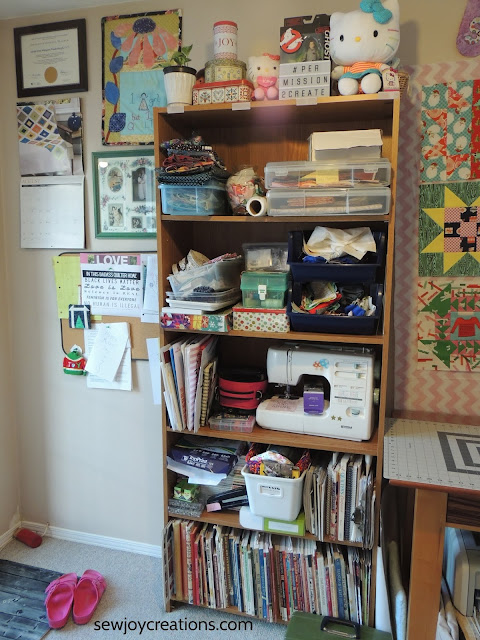
 This past week with so many projects wrapping up and more starting I decided to reorganize my sewing room bookcase. Like I had the time! Not really, but I knew there must be a reason because I just couldn't talk myself out of it.

 Here's what it looked like before

sewing room storage bookcase storage reorganizing

I actually didn't have a problem with what was on the shelves because it was working for me. I had projects I was working on and designing paperwork easily accessible. Why the need for change?

Well, I realized that most of my upcoming things to do in my sewing room involved finishing projects not starting them. I need to focus on quilting a few tops before I start more (no, for real this time!) LOL. I know that what I look at in my room motivates me and right now I need to be motivated to finish to make room for more. 

I also realized that as functional as my shelves were, they were not inspiring me. I miss going to my local quilt shop and seeing fabrics and displays. I decided that was really behind this need for change - I needed to be inspired to be a quilter again.


organized quilt room bookcase fabric display

A lot of things changed. Mostly books and magazines and papers got rearranged and some even left the sewing room altogether. I moved my Kenmore sewing machine to the bottom for some weight and put it's cover back on. My current Liberated Churn Dash fabrics are there waiting too, along with a stack of tops and a bin of scraps that still need to be sorted.


sewing machine cover project bins


The middle rows that are at standing height - the bookcase is to the left of my cutting table - will still be functional, storing scrap bins and current projects. But there is space here too and projects that aren't on the current list have been moved elsewhere. I don't need extra stress when I come in here and I can give myself permission to fill up the back burner of projects.


sewing room bookcase folded fabric scrap bins


The shelves became a place to admire fabric and see them stacked pretty (as oppossed to shoved and buried on the shelves in my closet.)

I also changed up the top display shelf to make it less Hello Kitty. She will come out to play again soon I'm sure, but for now less is more. And I can see my plant my daughter grew for me! Maybe now I'll remember to water it ;)

fabric folded bookcase display quilt room sewing room


My room feels calmer now when I walk into it and I smile at what I already have as part of my stash. I feel welcomed and encouraged to hang out in here and maybe even quilt.


It's been a great week for my sewing room. I hope this inspires you to find what you need with what you already have in your space. 


With Joy,

Sarah V.


newsletter subscribe button Sew Joy Creations


Read more...

Happy Followers

About This Blog

This blog exists to share my quiltmaking and joy of colour to inspire others to find their joy.

  © Blogger template Simple n' Sweet by Ourblogtemplates.com 2009

Back to TOP