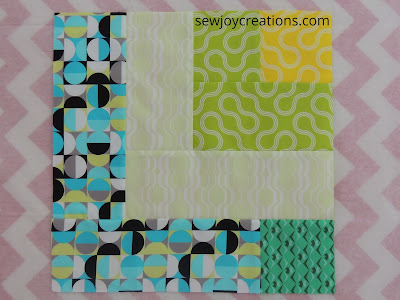
Showing posts with label #droppinginquilt. Show all posts

Welcome to the Citified Blog Tour!

>> Tuesday, March 15, 2022

 Today is my day on the Citified Blog Tour


Citified blog tour Island batik fabric Sherry Shish Powered by Quilting

Our host is Sherry Shish of Powered by Quilting

This is the third time I have taken part in a blog tour showcasing a signature line of fabric for Sherry. I have been inspired each time by the beautiful colours of the fabrics. 

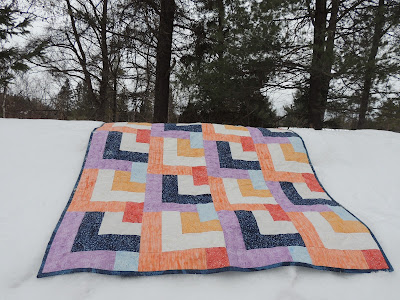
For this blog tour I revisited one of my patterns and made it with the Citified fabrics. Here is Dropping In featuring Sherry's signature line.

Dropping In pattern Sew Joy Creations Island Batik Citified fabric


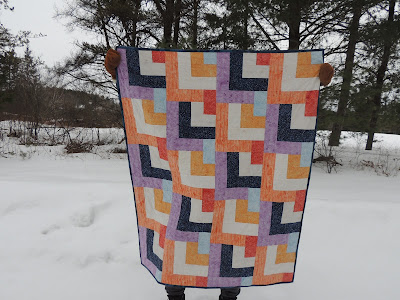
Dropping In quilt Citified Fabric blog tour


These colors make me look forward to summer sunsets! But they also remind me of the way light plays off the tall buildings in a big city. 

Dropping In quilt Sew Joy Creations Citified blog tour


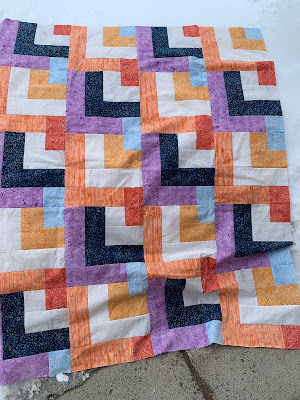
I chose my Dropping In pattern because I think this log cabin variation plays with the idea of modern buildings - it looks like one building just bumps right into the next! 


Dropping In quilt top Sew Joy Creations


Pattern Bundle this week only


Citified blog tour pattern bundle


I decided to have a special Pattern Bundle deal featuring the 3 patterns I've used during the 3 blog posts to feature Sherry's signature lines. 


Dropping In quilt Sew Joy Creations Citified fabric blog tour


The first pattern included in the bundle is Dropping In which I'm featuring in this blog tour :)

While right now my favourite is Citified, I have enjoyed the colours and fabrics of each past line too.

Sunbeams quilt Sew Joy Creations


Sunbeams is also included in the Citified Blog Tour bundle. 

The blog tour I featured this pattern in was for the Plum Pudding fabric line. These beautiful winter inspired batiks make me smile! I finally found some backing fabric I like for this one (one of Pat Sloan's Harmony widebacks in purple!) and this is on the shortlist to be quilted.

You can read more about the Plum Pudding blog tour here.


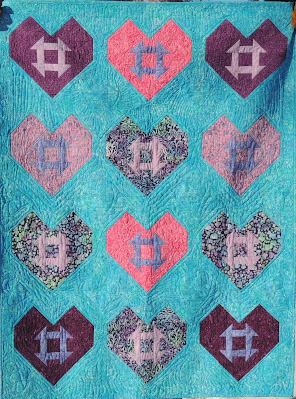
Hearts and Churns Sew Joy Creations


The final quilt pattern included in the Citified Blog Tour Bundle is Hearts and Churns.

This is one of my more recently quilted quilts. This fabric line, Love and Kisses, inspired many designers to create quilts with hearts on them. You may have seen the Exploding Heart Quilt by Slice of Pi? Same blog tour!

I like this quilt because I found a way to incorporate the churn dash - my first and still favourite quilt block. You might notice it shows up in my patterns a lot ;) 
You can read more about the Love and Kisses blog tour here.


This 3 pattern bundle deal is only available this week! 

The bundle gets you these 3 patterns at 20% off each compared to if you bought them all separately. You can get yours in my online shop

Citified blog tour pattern bundle


Blog Tour continues

The Citified Blog tour goes until March 20. There are several designers sharing their beautiful patterns in Sherry's Citified fabrics.


Thank you for visiting. Enjoy the rest of the tour :)


With Joy,


Sarah V.

P.S. Please consider subscribing to my newsletter. You will hear of specials first (like the Pattern bundle) and also have access to my library of free patterns that are only available to my newsletter subscribers. Subscribe here!

Read more...

More Fabric Acquisitions from this summer

>> Friday, August 27, 2021

 Mostly I buy fabrics with a plan.


wideback fabric Kim Diehl
I found this Kim Diehl wideback fabric while online shopping as part of Quilt Canada. This fabric will be the back of my On Ringo Lake quilt.


wideback quilt fabric Carrie Bloomston
I finally found and bought some of this wideback from one of Carrie Bloomston's lines. I knew I wanted to use it for the back of my rainbow Churn, Baby, Churn.

Churn Baby Churn quilt Sew Joy Creations rainbow

This is the same pattern I plan to make the larger version of with the Velvet fabric line I mentioned in my last fabric post.

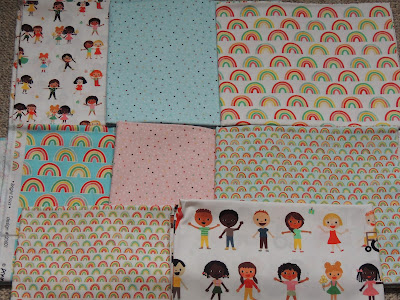
I was kind of on a roll this summer as some designers that I have been wanting to purchase fabric by came out with new lines. The next line I had to get fabric from was by Ann Kelle.

Ann Kelle Bright Days

There are so many rainbow fabrics out right now. I like that this one is done in brights and different scales. The kids are awesome too!

Dropping In quilt Sew Joy Creations

I bought the Bright Days fabric to make another Dropping In quilt. I already made this one using Christa Watson's Good Vibes fabric - and even did a quilt along.


 For the Bright Days fabrics, I am considering making the quilt upside down so it will look like rainbows. . . . hmmm

As you can see, I've got a lot of plans! Now I've got the fabric too;)


With Joy,

Sarah V.


Read more...

Bonus Week of the Sew Joy Sew Along Dropping In Quilt

>> Tuesday, September 8, 2020

 It's BONUS Week for the  Dropping In quilt sew along! 

Dropping In quilt pattern Sew Joy Creations

Purchase the Dropping In pattern in my online shop

Paper pattern available through QuiltWoman.com


These posts will always be available so start when you're ready!

Keep Quilting

Dropping In quilt


I'm happy to report that I was able to finish quilting my Dropping In quilt top. It took a few more sessions of quilting more lines of the serpetine stipple stitch to complete. Then I decided to quilt some lines across the quilt too - I quilted where the new rectangles happened when the two blocks joined. In the end it made for squiggly rectangles all over the top which I think is a pretty fun compliment to the Good Vibes fabric line.

Trimming


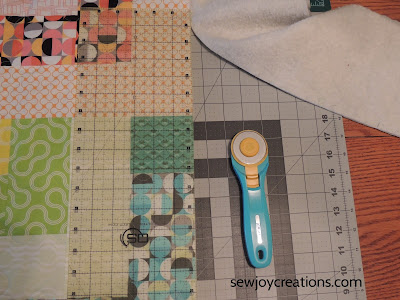
Then it was time to trip the quilt top square and remove the excess batting and backing. I use my large dining room table for this and bring my cutting mat to use on it.

trimming quilted top


The topstitching I did around the edge of the quilt top before I layered it for quilting came in handy in this step; I used it as a guide to line my ruler up on as I trimmed.

leftover batting and backing


I save the wider pieces of batting and usually most of the backing fabric that I trim off a quilt. I like to make small projects with my leftovers like the ones in Patterns by Jen's Batting Buster Week. 

midnight churn ornament pattern


My midnight churn ornament pattern was featured this year!

Adding Binding by Machine


I actually enjoy hand binding but don't really have the time to do it anymore. I add my binding to both sides of the quilt using the sewing machine. My method is pretty similar to Pat Sloan's and I find that the more I do it, the better I get at it.

binding Good Vibes fabric


I prepared my binding in Week 3 - you can go back here to read about it - and now it's just a matter of sewing it to the back and then the front.

binding back of quilt


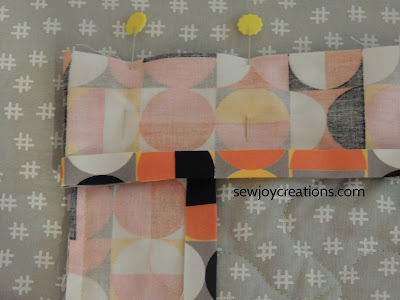
I like to start adding the binding at least half way down one of the longer sides of the quilt and cut a 45 degree angle at the beginning of the strip. The side without the ironed over seam is the side I pin and sew to the back. I leave the first few inches of the strip loose and pin just to the first corner and then I pin each side as I go. I sew 1/4" seam and stop 1/4" from the corner.

binding turning corner


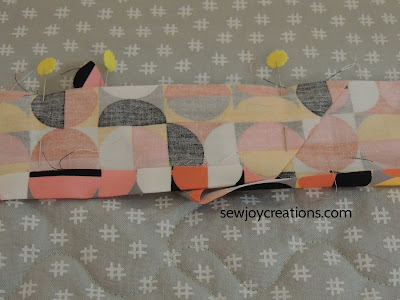
Then it's time to fold the binding at a 45 degree angle and then over itself to have enough to fold over the corner. Keep going until you're almost at the beginning of the binding strip.

finishing binding overlap binding ends


Lay the binding over the initial binding and cut off the excess a few inches past the overlap - cut on a 45 degree angle opposite the first. I finger press a 1/4" of the beginning strip over to the back, lay the ending strip over it and pin both in place. 

Stitch the Binding to the front


We're soooo close to done now! The binding strip already has an approximate 1/4" of material pressed to the wrong side. 
machine binding to front


Now I fold the remaining part of the strip in half and then fold over the far edge and pin it just covering that topstitch I did on the quilt top. Sometimes I use a machine blanket stitch to attach the binding to the front, but more often than not I'm now just using a regular sewing stitch.

I like to start a little before where the two ends of the binding overlap - just so I'm careful as I stitch over the extra bulk.  I stitch 1/8" inch into the binding and this lets my stitching line on the back run right against the edge of the binding if I'm lucky. Turning corners can be a bit tricky - it can take a few tries to fold the material in the corner to get a nice mitre.

binding corner top of quilt machine binding


Or just do your best and keep going :)

Link Up

quilted Dropping In quilt backing binding Good Vibes fabric


The Dropping In quilt sew along is complete! Thanks for following along. If you joined in and would like to share a photo, you can add one to the link up below. I will keep this open for a little while - probably a month or so. 

You can also use the hashtag #droppinginquilt to share on Instagram.

Thanks for joining me to #sewjoywithgoodvibes through these memorable times. It brought me joy and I hope it did the same for you!

With Joy,

Sarah V.

Join my newsletter list to stay up to date with sew alongs, pattern releases and more. Plus you get to enjoy freebies that are only available to my newsletter subscribers. Click the image below to sign up!

You are invited to the Inlinkz link party!

Click here to enter

Read more...

Week 5 of Dropping In Sew Along

>> Tuesday, September 1, 2020

Welcome to the Fifth Week of the Dropping In quilt sew along! It might not be the final one :)


Dropping In quilt pattern Sew Joy Creations

Purchase the Dropping In pattern in my online shop

Paper pattern available through QuiltWoman.com


These posts will always be available so start when you're ready!

Somehow we are already at the end of the sew along - that means it's time to turn our quilt top into a quilt! I usually get hung up and stop at this point in a quilt project - quilting the quilt continues to be the step that I need the most practice at.

I'm so glad we're doing this together so I actually get to finish and enjoy my quilt.

I did start to quilt my Dropping In quilt, but I'm not finished so I'm going to add one more week to this sew along and call it a bonus week ;) I'll even set up a link party so we can share our progress and hopefully some of us (me!) will even have finished quilts.

Make a Sandwich

This is the tricky part for many of us quilters who decide to quilt our own quilts; we need to get backing and batting and then find space to put the three layers together. 

I miss having my monthly Sew Days with my guild because we would pin our quilts as a group using raised wide tables. Now I just feel lucky enough to have a big enough floor space in my house to layer on the floor. I'm not a basting spray person, although the lap size of this quilt would be a great size for this method. If you have nice weather and the space, basting outside is also an option.

basting a quilt quilt sandwich floor basting


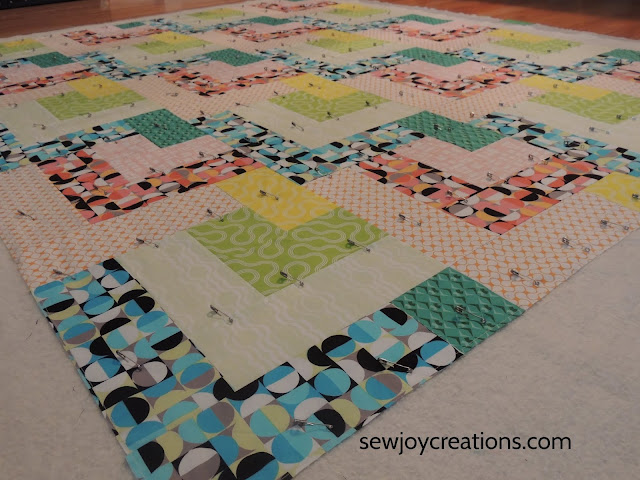
The trick to basting is making sure all three layers and joined and in the process no puckers or pleats or bumps develop. I use a painter's tape to tape my backing to the floor, taping opposite corners then the middle of each side. Then I do the same with the batting. Once these two layers are flat, I carefully place the quilt top over the layers with approximately 2" of batting and backing at each side.

Think Twice, Pin Once

I've learned to plan my quilting before pinning and I did this time too. The last thing you want to do is pin the top and then realize as you go to your machine and to start quilting that you have to remove each pin as you come to it. Yes you will probably start to remove pins after you've quilted some parts, but removing pins the whole time really doesn't keep the layers tight together.

dropping in quilt pinning the quilt top


I decided to quilt this quilt using one of the built in stippling stitches on the PFAFF performance icon. I like the way this stitch looks, it doesn't take a lot of time, and I think it complements all the circles in the fabric and contrasts with the squares and rectangles of the blocks. This meant that I could plan where to put my pins to give me spaces to quilt down the quilt top.

Thread Choice


aurifil thread quilting thread


One more part of the quilting process is to choose the color of thread to use. I'm not a thread expert but I do know that Aurifil is one of my preferred brands. I laid out a few options and took a photo so you could see how different neutral threads blend but also contrast with the different fabrics. I choose to use the light green (Aurifil 2880) because it blends in with the majority of the Good Vibes fabrics on the top.

Quilt

quilting PFAFF performance icon Dropping In quilt


Now it's time to enjoy the process of quilting the quilt. Plan to take breaks! If you're like me and you don't usually push an large top through and under a machine, realize this step is a workout. I like to make sure the quilt is supported to the left of the machine so it doesn't drag and cause more lifting and also potentially pulling under the needle. I start in the middle of the quilt and work my way out evenly on both sides. I did find that using quilting gloves made it easier to manoveur the quilt even though I really wasn't doing any free-motion quilting - the gloves just made it easier to move my hands down the quilt. Eventually this part is fun for me but I really have to set myself up for success. 

Week 5 to dos

Hopefully my tips will help you get your quilting accomplished this week. Even setting a timer for 15 minutes or telling yourself you'll do 5 rows of quilting then stop will help you get the top quilted.

If you get all of your quilting done, then it's trimming the excess off the sides of the quilt and adding the binding. I plan to use next week's bonus week for those 2 steps!

 ~ Come back next week for the Bonus Week

Join me in my facebook group where you can share photos of your fabrics. I'm also on instagram and using the hashtag #droppinginquilt to show my progress.

Let's #sewjoywithgoodvibes!

Sarah V.

Join my newsletter list to stay up to date with sew alongs, pattern releases and more. Plus you get to enjoy freebies that are only available to my newsletter subscribers. Click the image below to sign up!


Read more...

Dropping In Sew Along Week 4

>> Tuesday, August 25, 2020

Welcome to Week 4 of the Dropping In quilt sew along!


Dropping In quilt pattern Sew Joy Creations

Purchase the Dropping In pattern in my online shop

Paper pattern available through QuiltWoman.com


These posts will always be available so start when you're ready!
 

Today we sew the blocks together into the quilt top!

This might be my favourite week so far - seeing the quilt top come together. This is when the magic happens!

Dropping In quilt blocks

It's easy to use chain piecing again as you sew the blocks into rows; you could sew all of your rows together in one sitting! Of course, that might not be possible with other things to do as the summer winds down, but sewing even one row at a time this quilt comes together quickly. I started by putting some of the blocks up on my design wall just to see the fabrics bring the pattern to life.


design wall Dropping In quilt Good Vibes fabric


Be sure to follow the pattern as it gives guidance on pressing the seams. If you've been following the suggestions so far you'll find only nesting seams to deal with as you put the blocks together. This step is the first one I will use pins for and only to be sure that the blocks don't move while I'm getting the growing rows lined up by my machine.

sewing blocks together PFAFF performance icon


After the rows are ready and pressed, it will be time to sew them together. Take your time and pin here as there are a lot of seams. I like to pin at the nesting seams and then evenly between them just to keep the layers together as I move the top from the ironing board to the sewing machine.
pinning quilt rows Good Vibes fabric Dropping In quilt

Dropping In quilt pinning on ironing board

Basting Tip

When you are done sewing the quilt top together and have the final pressing done, go around the outside edge with a basting stitch. I rarely do this but my local quilt shop owner and long armer insists this is best practice and in this top I can see why! There are several seams that go to the edge of the quilt (common in quilts with no borders.) These seams will start to pull apart just from moving the top around which will mean I won't have closed seam allowances around the edge of the top where the binding will go. Having a quilt unravel is not what I look forward to when I'm done a project!

I set my regular stitch to 3" on the sewing machine and topstitched 1/8" around the edge of the quilt top - this basting stitch will be covered by the binding so no worries about it showing up in the finished quilt. And it will make layering and quilting the top easier whether you are doing it on your domestic machine or longarm or sending it out. Worth the time and thread!

Dropping In quilt Good Vibes fabric PFAFF performance icon

Week 4 to dos

~ Sew the blocks into rows and follow the pressing instructions in the pattern.

~ Sew the rows into the quilt top and press.

~ Do a basting stitch around the edge of the quilt to secure the seams.

~Share!


Good Vibes fabric Dropping In quilt

Join me in my facebook group where you can share photos! I'm also on instagram and using the hashtag #droppinginquilt to show my progress.

Let's #sewjoywithgoodvibes!

Sarah V.

Join my newsletter list to stay up to date with sew alongs, pattern releases and more. Plus you get to enjoy freebies that are only available to my newsletter subscribers. Click the image below to sign up!

Read more...

Dropping In Sew Along Week 3

>> Tuesday, August 18, 2020

Welcome to Week 3 of the Dropping In quilt sew along!


Dropping In quilt pattern Sew Joy Creations

Purchase the Dropping In pattern in my online shop

Paper pattern available through QuiltWoman.com


These posts will always be available so start when you're ready!


Today we sew Block Bs!

I love the cool blues and bright greens of last week's blocks, but the pinks this week make me giddy!
Seriously, I didn't realize how much fun these fabrics are - hopefully whatever fabrics you are using are also bringing you this much delight :)

chain piecing Dropping In quilt PFAFF performance icon

Chain piecing will be your trusty technique again this week - the simple squares and rectangle piecing make for an enjoyable, relaxing time at your machine. DO be sure to read the pattern as some seams will be pressed differently in these blocks to make quilt top construction easier. 


cat in sewing room chain piecing

There's usually at least one cat under my sewing table at any given time - especially when I'm sewing! Echo is the main companion, and he loves to stretch out and keep an eye on the foot pedal ;)


mask quilt fabric quilt block b Dropping In quilt


I had enough of the pink grid fabric left that I made myself a mask to match the quilt! I use the free pattern by Beebe Healthcare to make this style of mask. 

Binding Prep


I like to have my binding ready before I need to help me not procrastinate in finishing a quilt. This week you might have extra time and want to get yours ready too so I thought I'd share how I prep mine.
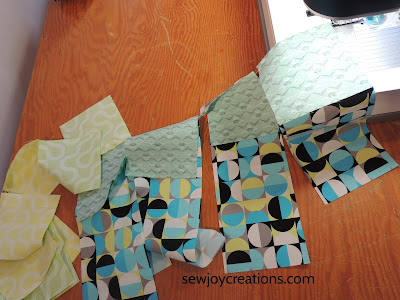
I join my strips by sewing them at a 45 degree angle to each other - I should have taken a photo of this step! 


binding prep ironed seams


I use my sewing machine to attach the binding to both sides of the quilt and I start by sewing it to the back. One step that I find makes it easier to do this (and was a tip from Pat Sloan) is to iron 1/4" of the binding to the wrong side along one of the edges - this edge will be sewn to the front. As I iron this edge down, I also press open the seams where the binding strips meet. This helps keep the binding smooth and flat as it goes on the quilt.

Here's a link to Pat's machine binding tutorial in case you want to try it out.

Week 3 to dos

~ Sew together the Block Bs
Repeat last week's steps, but with the Block B fabrics. Remember, you have all week! You can do these one unit at a time and chain stitch. Find 10 minutes a day and you will be able to complete these blocks this week.  

~Use the pattern to layout your fabrics to make sure you sew them together in the right order ;)
The pattern also gives directions for which direction to press the seams in your block to make putting the quilt top together easier.

~Prep the binding
If you have time and want to get ahead a bit, work on preparing the binding; sew the strips together at a 45 degree angle. Press these seams open and then, if you want to bind both sides to the quilt by machine, you can do what I do and iron 1/4" of one long edge of the binding to the wrong side.

~Share!

Join me in my facebook group where you can share photos of your fabrics. I'm also on instagram and using the hashtag #droppinginquilt to show my progress.


Let's #sewjoywithgoodvibes!

Sarah V.

Join my newsletter list to stay up to date with sew alongs, pattern releases and more. Plus you get to enjoy freebies that are only available to my newsletter subscribers. Click the image below to sign up!


Read more...

Dropping In Sew Along Week 2

>> Tuesday, August 11, 2020

Welcome to Week 2 of the Dropping In quilt sew along!


Dropping In quilt pattern Sew Joy Creations

Purchase the Dropping In pattern in my online shop

Paper pattern available through QuiltWoman.com


These posts will always be available so start when you're ready!
 
Today we sew Block As!

Dropping In quilt pattern Sew Joy Creations


These blocks sew together easily with no nesting seams. This week it is just a matter of making the time to get the blocks sewn.

Good Vibes fabric Dropping In quilt pattern

I noticed when taking my photos how many of my sewing room accessories match the Good Vibes fabric! I might need to make myself a pincushion too ;)

Chain piecing 

Chain piecing makes quick work of the blocks. When you chain piece,  you sew pieces together without cutting the thread between each pair. This block is easy to chain piece in steps over the week. 

chain piecing Dropping In quilt Good Vibes fabric

Following the pattern, you will be able to lay out your cut fabrics to keep track of where they go in the block and then start sewing!

Week 2 to dos

dropping in quilt good vibes fabric block a

~ Sew together the Block As
Remember, you have all week! You can do these one unit at a time and chain stitch. Find 10 minutes a day and you will be able to complete these blocks regardless of what else is going on in your life.

Use the pattern to layout your fabrics to make sure you sew them together in the right order ;)
The pattern also gives directions for which direction to press the seams in your block to make putting the quilt top together easier.

~Share!

Join me in my facebook group where you can share photos of your fabrics. I'm also on instagram and using the hashtag #droppinginquilt to show my progress.

Let's #sewjoywithgoodvibes!

Sarah V.

Join my newsletter list to stay up to date with sew alongs, pattern releases and more. Plus you get to enjoy freebies that are only available to my newsletter subscribers. Click the image below to sign up!


Read more...

Happy Followers

About This Blog

This blog exists to share my quiltmaking and joy of colour to inspire others to find their joy.

  © Blogger template Simple n' Sweet by Ourblogtemplates.com 2009

Back to TOP