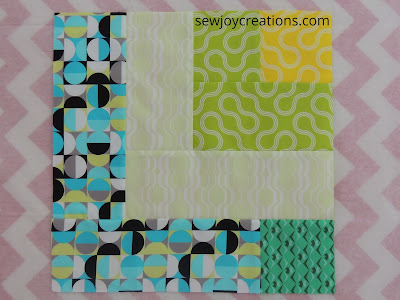
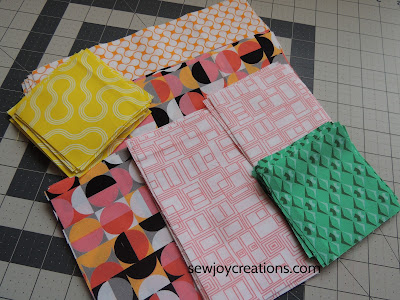
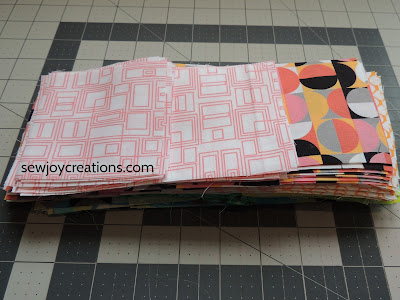
Showing posts with label #goodvibesfabric. Show all posts

Week 5 of Dropping In Sew Along

>> Tuesday, September 1, 2020

Welcome to the Fifth Week of the Dropping In quilt sew along! It might not be the final one :)


Dropping In quilt pattern Sew Joy Creations

Purchase the Dropping In pattern in my online shop


These posts will always be available so start when you're ready!

Somehow we are already at the end of the sew along - that means it's time to turn our quilt top into a quilt! I usually get hung up and stop at this point in a quilt project - quilting the quilt continues to be the step that I need the most practice at.

I'm so glad we're doing this together so I actually get to finish and enjoy my quilt.

I did start to quilt my Dropping In quilt, but I'm not finished so I'm going to add one more week to this sew along and call it a bonus week ;) I'll even set up a link party so we can share our progress and hopefully some of us (me!) will even have finished quilts.

Make a Sandwich

This is the tricky part for many of us quilters who decide to quilt our own quilts; we need to get backing and batting and then find space to put the three layers together. 

I miss having my monthly Sew Days with my guild because we would pin our quilts as a group using raised wide tables. Now I just feel lucky enough to have a big enough floor space in my house to layer on the floor. I'm not a basting spray person, although the lap size of this quilt would be a great size for this method. If you have nice weather and the space, basting outside is also an option.

basting a quilt quilt sandwich floor basting


The trick to basting is making sure all three layers and joined and in the process no puckers or pleats or bumps develop. I use a painter's tape to tape my backing to the floor, taping opposite corners then the middle of each side. Then I do the same with the batting. Once these two layers are flat, I carefully place the quilt top over the layers with approximately 2" of batting and backing at each side.

Think Twice, Pin Once

I've learned to plan my quilting before pinning and I did this time too. The last thing you want to do is pin the top and then realize as you go to your machine and to start quilting that you have to remove each pin as you come to it. Yes you will probably start to remove pins after you've quilted some parts, but removing pins the whole time really doesn't keep the layers tight together.
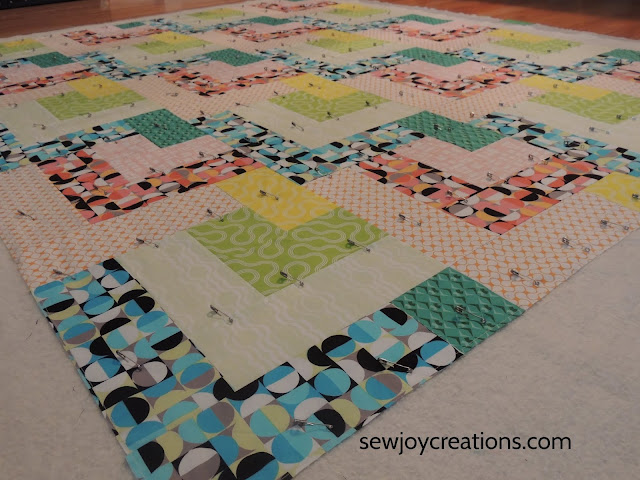
dropping in quilt pinning the quilt top


I decided to quilt this quilt using one of the built in stippling stitches on the PFAFF performance icon. I like the way this stitch looks, it doesn't take a lot of time, and I think it complements all the circles in the fabric and contrasts with the squares and rectangles of the blocks. This meant that I could plan where to put my pins to give me spaces to quilt down the quilt top.

Thread Choice


aurifil thread quilting thread


One more part of the quilting process is to choose the color of thread to use. I'm not a thread expert but I do know that Aurifil is one of my preferred brands. I laid out a few options and took a photo so you could see how different neutral threads blend but also contrast with the different fabrics. I choose to use the light green (Aurifil 2880) because it blends in with the majority of the Good Vibes fabrics on the top.

Quilt

quilting PFAFF performance icon Dropping In quilt


Now it's time to enjoy the process of quilting the quilt. Plan to take breaks! If you're like me and you don't usually push an large top through and under a machine, realize this step is a workout. I like to make sure the quilt is supported to the left of the machine so it doesn't drag and cause more lifting and also potentially pulling under the needle. I start in the middle of the quilt and work my way out evenly on both sides. I did find that using quilting gloves made it easier to manoveur the quilt even though I really wasn't doing any free-motion quilting - the gloves just made it easier to move my hands down the quilt. Eventually this part is fun for me but I really have to set myself up for success. 

Week 5 to dos

Hopefully my tips will help you get your quilting accomplished this week. Even setting a timer for 15 minutes or telling yourself you'll do 5 rows of quilting then stop will help you get the top quilted.

If you get all of your quilting done, then it's trimming the excess off the sides of the quilt and adding the binding. I plan to use next week's bonus week for those 2 steps!

 ~ Come back next week for the Bonus Week

Join me in my facebook group where you can share photos of your fabrics. I'm also on instagram and using the hashtag #droppinginquilt to show my progress.

Let's #sewjoywithgoodvibes!

Sarah V.

Join my newsletter list to stay up to date with sew alongs, pattern releases and more. Plus you get to enjoy freebies that are only available to my newsletter subscribers. Click the image below to sign up!


Read more...

Dropping In Sew Along Week 4

>> Tuesday, August 25, 2020

Welcome to Week 4 of the Dropping In quilt sew along!


Dropping In quilt pattern Sew Joy Creations

Purchase the Dropping In pattern in my online shop


These posts will always be available so start when you're ready!
 

Today we sew the blocks together into the quilt top!

This might be my favourite week so far - seeing the quilt top come together. This is when the magic happens!

Dropping In quilt blocks

It's easy to use chain piecing again as you sew the blocks into rows; you could sew all of your rows together in one sitting! Of course, that might not be possible with other things to do as the summer winds down, but sewing even one row at a time this quilt comes together quickly. I started by putting some of the blocks up on my design wall just to see the fabrics bring the pattern to life.


design wall Dropping In quilt Good Vibes fabric


Be sure to follow the pattern as it gives guidance on pressing the seams. If you've been following the suggestions so far you'll find only nesting seams to deal with as you put the blocks together. This step is the first one I will use pins for and only to be sure that the blocks don't move while I'm getting the growing rows lined up by my machine.

sewing blocks together PFAFF performance icon


After the rows are ready and pressed, it will be time to sew them together. Take your time and pin here as there are a lot of seams. I like to pin at the nesting seams and then evenly between them just to keep the layers together as I move the top from the ironing board to the sewing machine.
pinning quilt rows Good Vibes fabric Dropping In quilt

Dropping In quilt pinning on ironing board

Basting Tip

When you are done sewing the quilt top together and have the final pressing done, go around the outside edge with a basting stitch. I rarely do this but my local quilt shop owner and long armer insists this is best practice and in this top I can see why! There are several seams that go to the edge of the quilt (common in quilts with no borders.) These seams will start to pull apart just from moving the top around which will mean I won't have closed seam allowances around the edge of the top where the binding will go. Having a quilt unravel is not what I look forward to when I'm done a project!

I set my regular stitch to 3" on the sewing machine and topstitched 1/8" around the edge of the quilt top - this basting stitch will be covered by the binding so no worries about it showing up in the finished quilt. And it will make layering and quilting the top easier whether you are doing it on your domestic machine or longarm or sending it out. Worth the time and thread!

Dropping In quilt Good Vibes fabric PFAFF performance icon

Week 4 to dos

~ Sew the blocks into rows and follow the pressing instructions in the pattern.

~ Sew the rows into the quilt top and press.

~ Do a basting stitch around the edge of the quilt to secure the seams.

~Share!


Good Vibes fabric Dropping In quilt

Join me in my facebook group where you can share photos! I'm also on instagram and using the hashtag #droppinginquilt to show my progress.

Let's #sewjoywithgoodvibes!

Sarah V.

Join my newsletter list to stay up to date with sew alongs, pattern releases and more. Plus you get to enjoy freebies that are only available to my newsletter subscribers. Click the image below to sign up!

Read more...

Dropping In Sew Along Week 3

>> Tuesday, August 18, 2020

Welcome to Week 3 of the Dropping In quilt sew along!


Dropping In quilt pattern Sew Joy Creations

Purchase the Dropping In pattern in my online shop


These posts will always be available so start when you're ready!


Today we sew Block Bs!

I love the cool blues and bright greens of last week's blocks, but the pinks this week make me giddy!
Seriously, I didn't realize how much fun these fabrics are - hopefully whatever fabrics you are using are also bringing you this much delight :)

chain piecing Dropping In quilt PFAFF performance icon

Chain piecing will be your trusty technique again this week - the simple squares and rectangle piecing make for an enjoyable, relaxing time at your machine. DO be sure to read the pattern as some seams will be pressed differently in these blocks to make quilt top construction easier. 


cat in sewing room chain piecing

There's usually at least one cat under my sewing table at any given time - especially when I'm sewing! Echo is the main companion, and he loves to stretch out and keep an eye on the foot pedal ;)


mask quilt fabric quilt block b Dropping In quilt


I had enough of the pink grid fabric left that I made myself a mask to match the quilt! I use the free pattern by Beebe Healthcare to make this style of mask. 

Binding Prep


I like to have my binding ready before I need to help me not procrastinate in finishing a quilt. This week you might have extra time and want to get yours ready too so I thought I'd share how I prep mine.
I join my strips by sewing them at a 45 degree angle to each other - I should have taken a photo of this step! 


binding prep ironed seams


I use my sewing machine to attach the binding to both sides of the quilt and I start by sewing it to the back. One step that I find makes it easier to do this (and was a tip from Pat Sloan) is to iron 1/4" of the binding to the wrong side along one of the edges - this edge will be sewn to the front. As I iron this edge down, I also press open the seams where the binding strips meet. This helps keep the binding smooth and flat as it goes on the quilt.

Here's a link to Pat's machine binding tutorial in case you want to try it out.

Week 3 to dos

~ Sew together the Block Bs
Repeat last week's steps, but with the Block B fabrics. Remember, you have all week! You can do these one unit at a time and chain stitch. Find 10 minutes a day and you will be able to complete these blocks this week.  

~Use the pattern to layout your fabrics to make sure you sew them together in the right order ;)
The pattern also gives directions for which direction to press the seams in your block to make putting the quilt top together easier.

~Prep the binding
If you have time and want to get ahead a bit, work on preparing the binding; sew the strips together at a 45 degree angle. Press these seams open and then, if you want to bind both sides to the quilt by machine, you can do what I do and iron 1/4" of one long edge of the binding to the wrong side.

~Share!

Join me in my facebook group where you can share photos of your fabrics. I'm also on instagram and using the hashtag #droppinginquilt to show my progress.


Let's #sewjoywithgoodvibes!

Sarah V.

Join my newsletter list to stay up to date with sew alongs, pattern releases and more. Plus you get to enjoy freebies that are only available to my newsletter subscribers. Click the image below to sign up!


Read more...

Dropping In Sew Along Week 2

>> Tuesday, August 11, 2020

Welcome to Week 2 of the Dropping In quilt sew along!


Dropping In quilt pattern Sew Joy Creations

Purchase the Dropping In pattern in my online shop


These posts will always be available so start when you're ready!
 
Today we sew Block As!

Dropping In quilt pattern Sew Joy Creations


These blocks sew together easily with no nesting seams. This week it is just a matter of making the time to get the blocks sewn.

Good Vibes fabric Dropping In quilt pattern

I noticed when taking my photos how many of my sewing room accessories match the Good Vibes fabric! I might need to make myself a pincushion too ;)

Chain piecing 

Chain piecing makes quick work of the blocks. When you chain piece,  you sew pieces together without cutting the thread between each pair. This block is easy to chain piece in steps over the week. 

chain piecing Dropping In quilt Good Vibes fabric

Following the pattern, you will be able to lay out your cut fabrics to keep track of where they go in the block and then start sewing!

Week 2 to dos

dropping in quilt good vibes fabric block a

~ Sew together the Block As
Remember, you have all week! You can do these one unit at a time and chain stitch. Find 10 minutes a day and you will be able to complete these blocks regardless of what else is going on in your life.

Use the pattern to layout your fabrics to make sure you sew them together in the right order ;)
The pattern also gives directions for which direction to press the seams in your block to make putting the quilt top together easier.

~Share!

Join me in my facebook group where you can share photos of your fabrics. I'm also on instagram and using the hashtag #droppinginquilt to show my progress.

Let's #sewjoywithgoodvibes!

Sarah V.

Join my newsletter list to stay up to date with sew alongs, pattern releases and more. Plus you get to enjoy freebies that are only available to my newsletter subscribers. Click the image below to sign up!


Read more...

Dropping In Sew Along ~ Welcome to Week 1

>> Tuesday, August 4, 2020

I'm sew glad you're here!

This is Week 1 for the Dropping In quilt pattern sew along.
Purchase the Dropping In pattern in my online shop


These posts will always be available so start when you're ready!
You can find a link to all of the posts in one spot - right here.

Let's get started!

Good Vibes fabric Christa Quilts


This week is all about cutting your fabrics. I like to read through the quilt pattern and look at all the photos/diagrams before cutting. Why? Well, sometimes a photo tells you things you need to see to understand. 
I look and think about 
what is creating the design elements that I like
and 
how I can make that happen with my fabrics?

Sometimes it's the fabric that makes the quilt!

Dropping In quilt Sew Joy Creations Good Vibes fabric

In the Dropping In quilt pattern, the design moves down the quilt and repeats itself using two different blocks. I need contrast between my fabrics in the block as well as between the blocks to make the design move across the quilt.

Good Vibes fabric Dropping In quilt units

With the Good Vibes fabric, I chose to make one block in cool colours and one block in warm colours - mostly!
Cool colours are blue, green, and purple; warm colours are red, orange, and yellow.
This is a natural contrast and works well in this quilt.
Switching between light and dark fabrics is one way to make the design work - you could also play with prints and solids.

With the Good Vibes fabrics they are all prints, but half of the line features prints with dark backgrounds and half have light backgrounds, or read as what quilters refer to as neutrals. I alternated dark and light prints in my blocks and also varied the scale of the prints to keep them from blending into each other.

Directionality of the prints didn't really matter to me for most of the prints. This means that I just cut the fabric as listed in the pattern. I did purposely cut one fabric to make it's pattern go vertically(up and down the cut fabric) on the quilt and not horizontal(across the cut fabric) because of the overall movement of the quilt design down the quilt. 

Good Vibes fabric quit block units

Can you see the one fabric has its pieces cut in what looks like opposite directions? Wait to see what they look like in the block next week ;)

KIT TIP:

I changed my mind about the placement of 2 fabrics once I saw them in real life. 
This does not change the amounts of fabric required, just fabric placement.

Fabrics Dropping In quilt

I switched Fabrics C and G around - this means the fabrics will be placed in the opposite positions from my original version of the quilt.
I did this because the two green fabrics I chose don't look as good beside each other and I think the C and G fabrics look better beside the opposite fabrics.

The picture of the quilt now features the fabrics in their new spots :)

Week 1 To Dos

Good Vibes fabric Dropping In quilt sew along

~Cut fabrics for the quilt top

You might want to wash and/or iron them first. I used to be a wash-everything-as-it-comes-into-my-sewing-room kind of quilter, but that was years ago! Now I iron before cutting and feel no anxiety about colorfastness or shrinkage. I use the best cotton fabrics I can afford.

Use the cutting instructions in the pattern to cut the pieces for the entire quilt top. This will make the rest of the sew along all about sewing! I even cut the binding strips and have them ready to sew together.

Remember to keep in mind the direction of your prints when cutting. You get to decide if you want to emphasize it or not - cut up directional prints create interest in a quilt when you are snuggled underneath it. If you are using the kit from Christa, you can cut your fabrics like I did or not. It's still your quilt :)

~Keep the cut fabrics organized

For this quilt it's pretty easy to keep the pieces organized but sometimes I will also add a label that says what the fabric is in my quilt, for example, Fabric A.  I try to label the cut pieces in some way especially if I have to move them before working on the project. In this case, I am stacking mine in two piles - one for Block A and one for Block B. You can put your cut pieces in a container until next week if you're like me and making other things too!

~Share!

Join me in my facebook group where you can share photos of your fabrics. I'm also on instagram and using the hashtag #droppinginquilt to show my progress.


Enjoy cutting this week!

Sarah V.


Join my newsletter list to stay up to date with sew alongs, pattern releases and more. Plus you get to enjoy freebies that are only available to my newsletter subscribers. Click the image below to sign up!

Read more...

Sew Joy Sew Along with Dropping In pattern

>> Saturday, July 11, 2020

The first Sew Joy Sew Along is for the pattern,  Dropping In!


Dropping In quilt Good Vibes fabric


You can read more about the pattern if you'd like in this post.


The sew along will go for 5 weeks, with posts here on the blog each Tuesday. 

Week 1 - August 4 - cut fabrics

Week 2 - August 11 - sew blocks

Week 3 - August 18 - sew blocks

Week 4 - August 25 - assemble quilt top

Week 5 - September 1 - quilt and bind

Join my facebook group where you can share photos and chat with other quilters.


I created a free Sew Along Checklist for Quilters - use it to get ready for this, or any other, sew along!


Dropping In quilt serpetine quilting


Let's #sewjoywithgoodvibes


With Joy,

Sarah V.


Stay up to date with all the joyful happenings by subscribing to my newsletter. 
Plus receive access to freebies that I only share with newsletter subscribers.


Read more...

Happy Followers

About This Blog

This blog exists to share my quiltmaking and joy of colour to inspire others to find their joy.

  © Blogger template Simple n' Sweet by Ourblogtemplates.com 2009

Back to TOP