Showing posts with label backing leftovers challenge. Show all posts

Make something new out of quilt backing leftovers

>> Wednesday, August 29, 2018

There's always more fabric - isn't that true!  This is the third post in the Quilt Backing Leftovers Challenge; you can find the first post by clicking here


leftover fabric quilt trimmings


The last post listed three ways to use up the leftovers; this post exists because I left out one special way to use up leftovers - 

use them up to make something you've never made before!


There are always one or two new projects that show up in one social media feed or another that I want to try out. Finding time is one thing, but sometimes it's also wondering what fabric to use to make it. What if I don't like the project and I regret using special fabric?

Sometimes what also happens is that the more I look at a fabric, the more likely I am to find a project that it would look good in:)

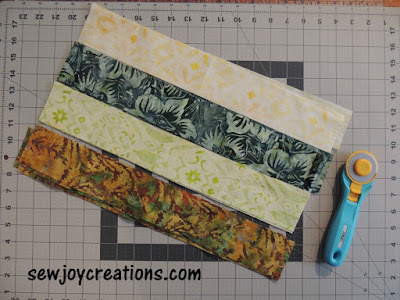
Case in point - I used some of the backing leftovers trimmed to 2 1/2" strips and cut some more batik strips to go with them.

fabric strips batik fabric ready to create with

Then I went back to a lookbook I had gone through and decided I could change the pattern enough to make it fun and doable. The giant leaf is supposed to be 'it' with no background. Instead I used my machine's blanket stitch to applique the leaf to a black background.

Here's a link to Jessica Swift's blog post that has a photo of the leaf project and a link to her lookbook - it's for her second line of fabric with Art Gallery.


giant fabric leaf appliqued to black background

Then I quilted it with a batik fat quarter on the back. You can see from the photo that I  quilted in the ditch between each strip to secure the layers; I'm pretty sure it will get used and need to be washed!


batik fat quarter as backing of table topper


This project will actually get to go and live with my daughter in her university residence. And, with the trimmings from THIS project, I made potholders to coordinate with it.


batik table topper and potholders


Now all that remains of my backing leftovers are some useable size scraps and a few bits to include in a scrappy quilt. 

I encourage you to do a Backing Leftovers challenge - it can push you out of your comfort zone to try something new!


With Joy,

Sarah V.


CLiCK on the big Sew JOY button below to 
Subscribe to my newsletter :)


Read more...

Three ways to use up backing leftovers

>> Thursday, August 9, 2018

I have been busy using up my backing leftovers! In fact, I discovered that I have been hoarding saving backing leftovers from several quilts. In the first post I showed you how I used backing leftovers to make a simple pot holder. Today's post will go over 3 ways to deal with backing leftovers. 

quilt backing leftovers projects


1. Throw them away


Yep. I'll put that out there first because it can save you a lot of time. Maybe you won't throw them out right away, but one day you might. Be open to the idea that really, you just don't need to use them up!
I discovered this fact when I went looking for a box for mailing a quilt. The perfect size box was holding my stash of fabric that is less-than-a-fat-quarter-but-more-than-a-bit. Offcuts. Backing leftovers - lots of them! I started to sort and iron the pieces and rather quickly discovered that I really wasn't going to use some of the backing leftovers. Ever. 

Number one is permission to throw the backing leftovers away. 


2. Make something


Anything really. I found that some of the backing leftovers from a baby quilt were calling to me during my sorting. I ironed them, cut some strips and made a large, bright churn dash with them. The bright red alphabet print is the backing leftovers; the word fabric was from the actual baby quilt and the bright print is from a fat quarter in my stash that has been sitting and waiting for a fun place to hang out. I think I'm going to turn this into an open wide zippered pouch using Noodlehead's tutorial; it would be fun for storing markers in.

bright churn dash block

Any project that you can quickly assign the fabric to and preferably make would be best.

I also cut some of the backing fabric I started with into another pot holder and several churn dashes using my Churn, Baby, Churn pattern to make a table runner. The current dashalong pattern would also be a good way to use up backing leftovers.

two pieced potholders scrap fabric batik project

churn dash runner batik project Banyan batiks


Backing leftovers are  also great material for any favourite block that uses strips. 


Make:

 a kennel quilt
 a doll quilt
pot holders
placemats
mug rugs
pencil case
makeup pouch


Number two is, if the fabric inspires you, make something with it.


3. Prep it for stash keeping


Maybe you do like the backing leftover fabric but don't have time right now to start and finish a project. Take the time now to iron it, cut it into usable pieces and store it with your stash.
Backing leftovers most likely can be easily cut into common precut sizes like 5" squares and 2 1/2" strips. If you know you want to work on a project with 2 1/2" squares, you might consider cutting them to size now too. 
This year's leader and ender project by Bonnie Hunter uses 2 1/2" squares - just sayin' ;)

Binding strips could also be cut from the backing leftovers; I cut mine at 2 1/2" wide. Cut the backing leftovers into something that you will use, put it in its new home and move on.

Number three is, prepare the fabric and put it away for later.


Backing leftovers are still fabric! If you don't want to keep it - don't. I throw out the ones that are too stringy to save, or from fabric that I'm no longer interested in working with in a project. If I still like the fabric, or it's grown on me (it happens!) I will use it up or save it for later. It can be fun to find pieces in scrap projects in later years that remind you of a quilt you gave away. 

Pick a way to deal with your backing leftovers and get back to quilting. I'll be back to share another project I made from the backing leftovers soon.


Feel free to share in the comments a project you've made using backing leftovers. Include a link and I'll come over for a virtual visit :)


With Joy,

Sarah V.

Read more...

Backing Leftovers Challenge - Project Number One

>> Friday, July 27, 2018

There's nothing like that sense of relief followed by overwhelm when I finish making a quilt. Do you know what I mean? The accomplishment is quickly filled with the vacuum of time that now exists where that project ended. What to work on next?!

Some of that angst is also regret over the leftovers. The bits of fabric that weren't needed that will now be relegated to the scrap bin, larger pieces shoved back into the stash or maybe just left on the bottom of the UFO pile on the shelf. But, the backing leftovers that get cut off when trimming the quilt never had a home to begin with - their mission is complete, but there's so much usable STUFF there still! Isn't there?

Sometimes yes. Sometimes, you've had enough of the project and just want it all to go away. Other times the fabric you thought you would just "use up" grows on you after all that close physical contact and you want to savour it a bit longer. But how?

quilt backing trimmings


Herein lies my latest challenge! I love this backing fabric - a new Banyan batik from the Mary line that came out this June. I did a project for QUILTsocial with some of the other prints and just finished a quilt that you'll see much later. 

Mary Batiks Cushion Cover

I decided I wanted to use some of it up and challenged myself to do it. I have a little window of time between projects - enough to keep me focused to complete some little things.

Here's my first one - a potholder.

fabric pieces potholder

Quick and easy. From the backing fabric I used two - 2 1/2" x 4 1/2" strips and two 2 1/2" x 8 1/2" strips. The four patch uses two 2 1/2" squares of two different colour fabrics.

You could do this with leftover binding strips too. Or just scraps. 


  • Make the four patch, then add the short strips to each side. Press the seams to the strips.
  • Sew a long strip to the top and one to the bottom; press seams to the strips.
  • Potholder top should measure 8 1/2" square.


The backing is from another fat quarter that I didn't use yet - I'm sure you have some extra fat quarters stacked somewhere too ;) Cut one 8 1/2" square.

I used two pieces of batting cut 8 1/2" square - leftovers from cutting the original batting to the quilt size. The batting from the quilt trimming will probably end up as stuffing in another project on my to-do list this summer.


  • Place the two layers of batting on top of each other on your pinning surface.
  • Put the backing piece RIGHT SIDE UP on top.
  • Place potholder top RIGHT SIDE DOWN on top to finish the pile.
  • Pin all the way around, leaving a 2" turning gap along one of the long strip sides.
  • Sew all the way around, backstitching at beginning and end of turning gap.
  • Clip corners, turn potholder right side out through turning gap.
  • Finger press turning gap seam, then topstitch 1/8" around edge.
  • I quilted in the seam around the four patch too. 


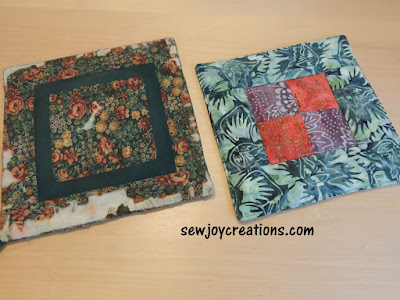
old potholder new potholder four patch quilted potholder

A quick finish. And now I can finally replace a potholder that was a wedding gift 22 years ago! (hopefully mine will last as long!)


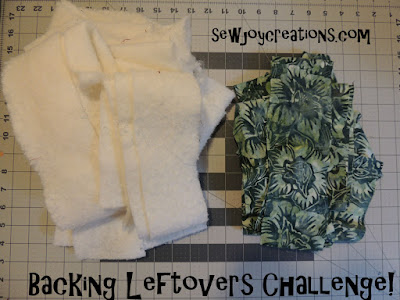
batting and backing left from trimming quilt

I'll be back with more backing leftovers challenge projects.

Do you have some ideas for me? What would you make?


With Joy,

Sarah V.

Read more...

Happy Followers

About This Blog

This blog exists to share my quiltmaking and joy of colour to inspire others to find their joy.

  © Blogger template Simple n' Sweet by Ourblogtemplates.com 2009

Back to TOP